What Are the Differences Between Positional Tolerance, Profile Tolerance, and Surface Finish?
The differences between positional tolerance, profile tolerance and surface finish, in regards to the accuracy of machined components is important to understand. In manufacturing, there is always going to be a level of variance and tolerance or also called a measurement of variation. Since perfection is something that high accuracy cutting and ultra precision engineering strive for, having the least amount of variance is the ultimate goal. When working with tight tolerance machining specialists, you might hear the phrase, “geometric dimensioning and tolerancing” or GD&T. This along with surface finishing specifications, create a series of tools used to limit variations and confirm functionality and quality standards are met for every manufactured component.

Positional tolerance, profile tolerance and surface finish all have importance regarding manufacturing. The impact is perhaps greater as required tolerance becomes tighter and are in part for critical industries needs and applications. How these three factors differ from each other will give a better understanding of how they are used in manufacturing.

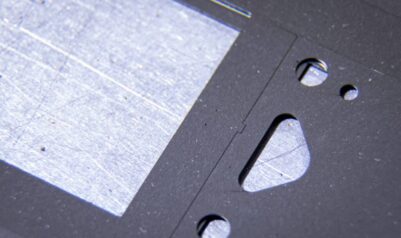
- Positional Tolerance: This tolerance ensures all features like holes, slots, and other key points of geometry are where they are supposed to be. Features such as these are referenced from a datum point. This set point can be any feature designated on the production print. As each feature will have a center point, positional tolerance will define the area or zone.
- This focuses on the feature, but not the shape of the feature.
- It is a confirmation of feature placement, that is crucial to manufactures where parts will be assembled.
- These zones will be circular for round holes and square or rectangular for slots.
- Positional Tolerance is like a map of coordinates to the designated features and tells you where each of them is supposed to be.
- Profile Tolerance: This is also referred to as form tolerance and is the acceptable variation of a surface or shape of the intended form. In this group there will be tolerances for:
- Straightness: Defines the shape of a true line or straightness.
- Roundness: Circular or round features will have limitations in which are acceptable.
- Flatness: The variation allowed in the flatness of the surface is relative to a reference on the plane.
- Cylindricity: This indicates the allowed deviations of any cylindrical feature in conjunction with roundness, straightness and diameter.
- Surface Finish: The microscopic variations of the surface finish are what is measured and controlled by this tolerance. It is a way to quantify factors such as:
- Waviness: Waviness is caused by deflection or vibration and is a larger irregular deviation. Measurements of the space between irregularities are impacted negatively by waviness.
- Lay: The orientation of surface textures.
- Surface Roughness: The total amount of high and low irregularities on the metal surface.

Key parameters measured are Ra, for the average roughness, Rv for the average roughness depth, Rmax, measuring vertical difference within the measured area by measuring the highest peak above and the lowest valley below the centerline values and other parameters.
Understanding the nuances between positional profile tolerance and surface finish tolerance is crucial for ensuring the quality and functionality of manufactured parts. While profile tolerance focuses on the geometric accuracy and form of the surface, surface finish tolerance hones in on the texture and microscopic variations. Both play a pivotal role in ensuring that components fit seamlessly, operate efficiently, and maintain longevity. Mastering these concepts not only enhances precision in engineering but also drives innovation, enabling the creation of complex and reliable products that meet the highest standards of excellence. As technology advances, the meticulous control of these tolerances will continue to be a cornerstone of modern manufacturing, inspiring new heights of precision and performance.
